DIY MTM Speakers…
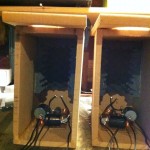 Last weekend I got my Jasper circle cutting jig in the mail and started to finish up the construction of these speaker cabinets. I first tested out the crossovers on the bench to make sure they worked, then went ahead and glued them to the base of the cabinets. I made them to be the same size as the cabinet, but I was amazed when they actually fit! I also glued some egg crate foam to the back, top, and sides towards the back of the cabinet. I have no idea if this will do anything, but other people seem to do it and I had some lying around. Can’t hurt too much can it!
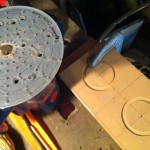 Next I went ahead and got started cutting out the baffle. The M3N is designed to be flush mounted, so I had to cut a recess in the front baffle first. The jasper jig makes that extremely easy to do. I highly recommend one of those things if you plan to be cutting circles. After the recesses were cut I cut the driver holes and the tweeter holes. The ND20 tweeter ended up being a really odd size, between two sizes on the jasper. I could have either cut the hole slightly too small and sanded the rest of the way, or slightly too big and leave a little gap. I decided to cut it slightly big because I thought the paint may build up the sides a little bit as well. I think I ended up using the 1 7/16″ hole size.
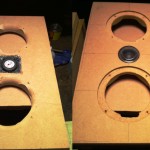 The final work on the baffle was making sure everything fit! I had to cut out little notches on the driver holes to account for the little wire terminals, which wasn’t too big of a deal. Then I checked for fitting and it all looked good, so I drilled the holes for the mounting screws and rounded over the back of the hole. This apparently is fairly important in directing the sound inside the cabinet, so that it doesn’t just get directed straight towards the back wall and cause bad reflections. I mounted the tweeters with a few screws, wood glue, and sealant (they aren’t going anywhere!) and on the left you can see the completed baffles!
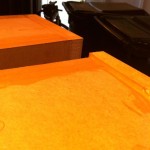 Just as I did with the rest of the cabinet, I cut the baffles about 1/8″ large all the way around and used a flush trim router bit to get them nice and perfect. You can see the before and after picture on the right. That flush trim it is awesome! I wish I had it when I was building the garage system. It would have saved me a lot of paint prep work.
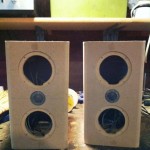 The final construction step was to round off the sides. You can see the completed, unfinished cabinets on the left. They came together really nicely and I like the look of just the sides rounded over.
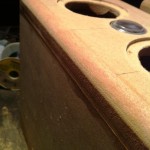 I started on the paint prep work last night by sealing up all the cut MDF edges with standard white Elmer’s glue. The cut MDF edges tend to soak up paint like a sponge, so this should hopefully help minimize that. I’ll probably start doing the rough sanding tonight and maybe get these ready for painting by the weekend. The last set I did in a semi-gloss black, but they still came out a little too glossy for my taste. I’m going to try flat black this time and see how it goes. I’ve seen a couple of others do flat black and they look really sharp, so that’s what I’m hoping for. It should match the trim on the monitor pretty close as well!

Leave a Reply